Jun
3
2016
My first two travel-teaching classes for 2017 have been added to my Classes page on my website.
There are 2 spots left in the February intensive at my studio in Berkeley, California.

The first travel-teaching class is the annual Tucson workshop which takes place on February 10-12, 2017, during the big gem show. This year the topic is structural carving, which means forming sculptural objects by subtraction, starting from a solid lump of clay.

![t-IMG_3906[1]](http://artinsilver.com/blog/wp-content/uploads/2016/04/t-IMG_39061.jpg)
To sign up please contact Lyle Rayfield at: bdangled@dakotacom.net.
The second class is actually 2 separate back-to-back workshops in Lafayette, Louisiana. The first one is 3 days, on March 22-24, 2017. It covers preparing forms for chip and rock inlay. This class is almost full.


The second one is on March 25-26, 2017. This workshop covers hand-forming and texturing vases and knobs, then coloring them patina-style.


To sign up please contact Paula McDowell at: paulamcdowell@bellsouth.net, or lapmcguild@gmail.com, phone: 517.285.5523.
2 comments
May
13
2016
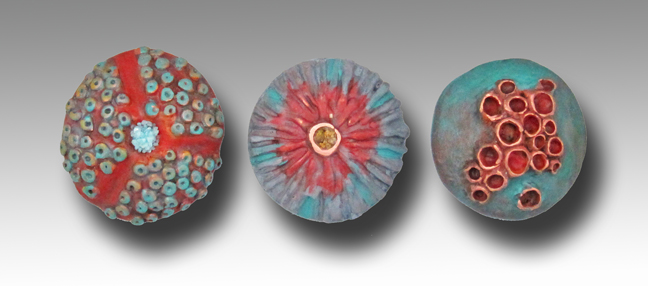
Here are more pieces that I have been working on for the Sculptural Carving Intensive on February 24-28, 2017.


6 comments
Apr
26
2016
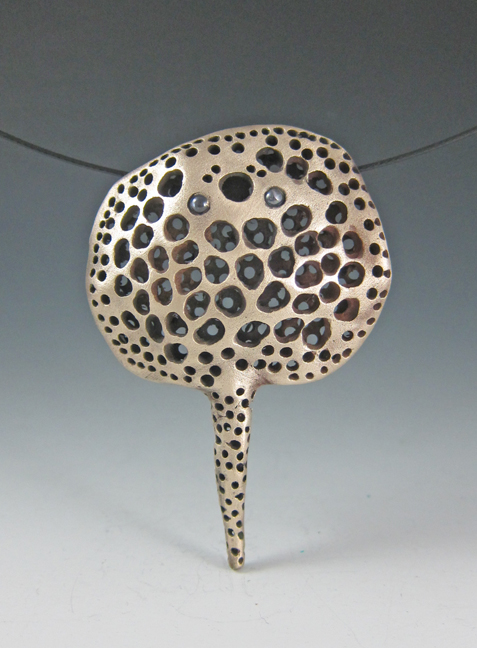
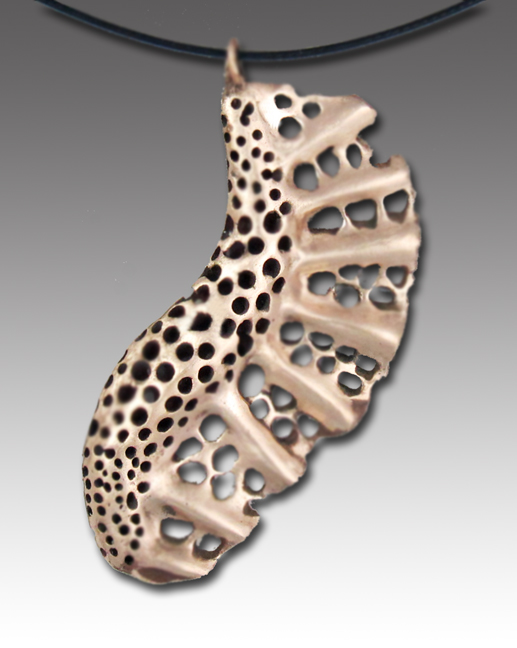
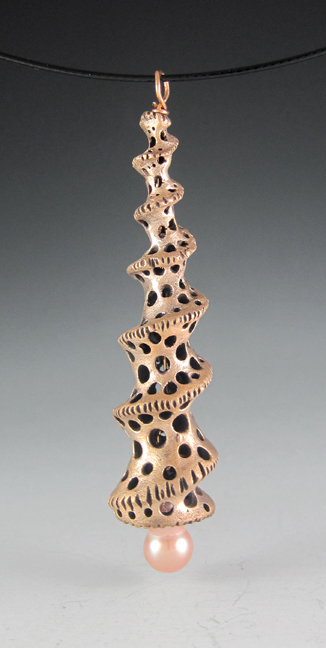
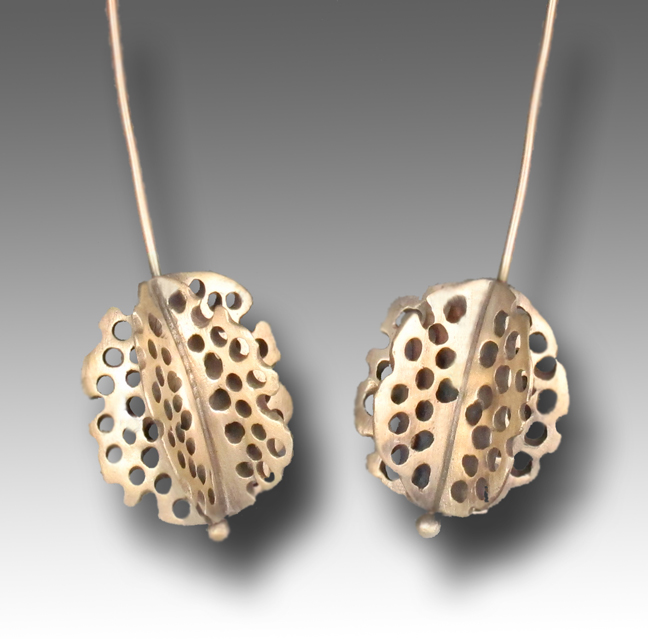
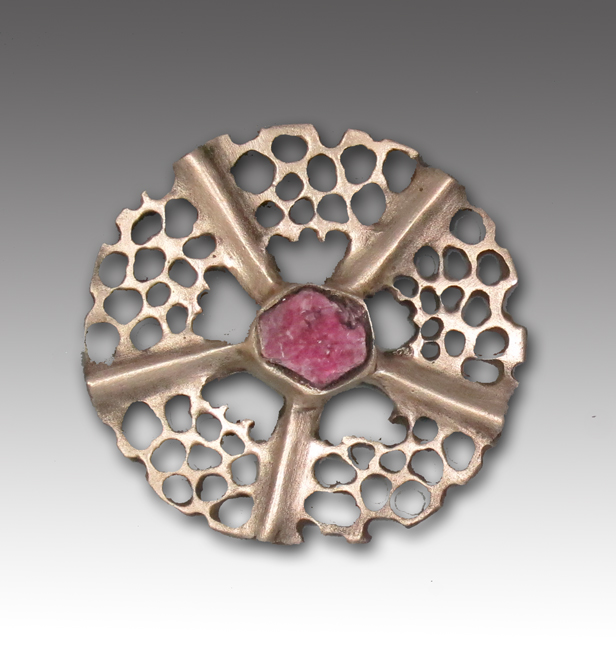
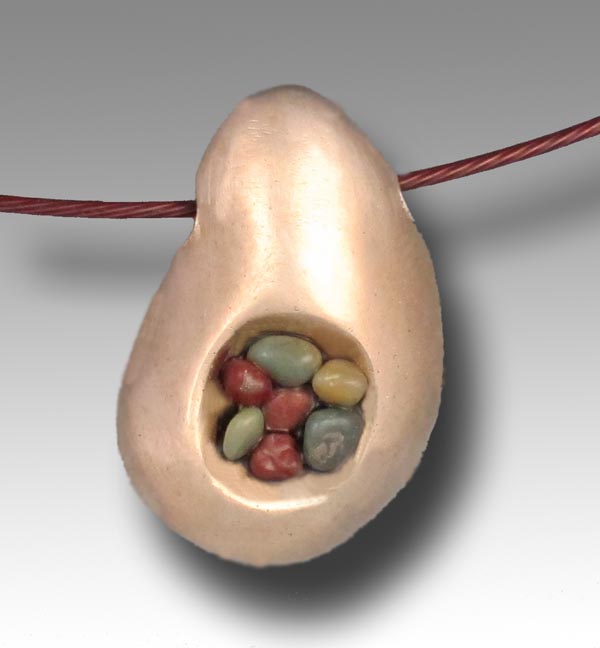
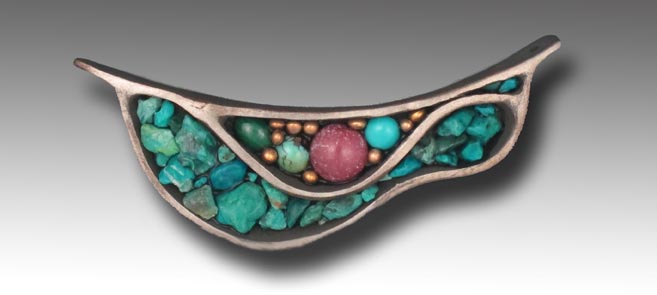
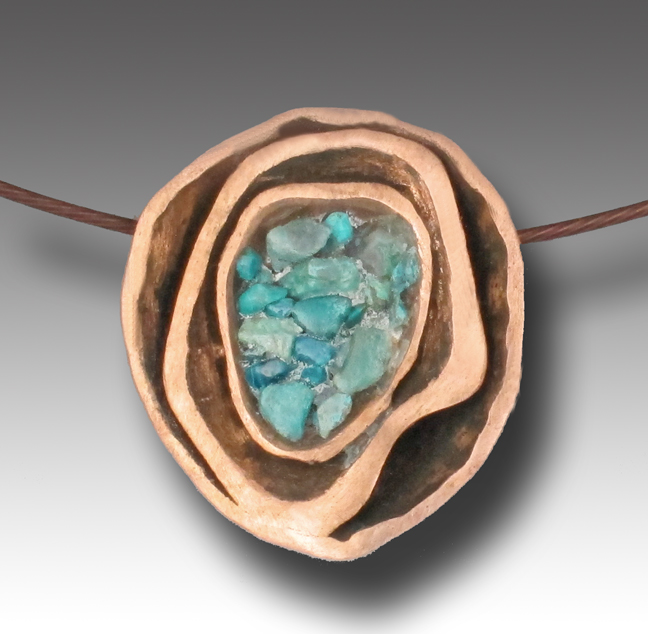
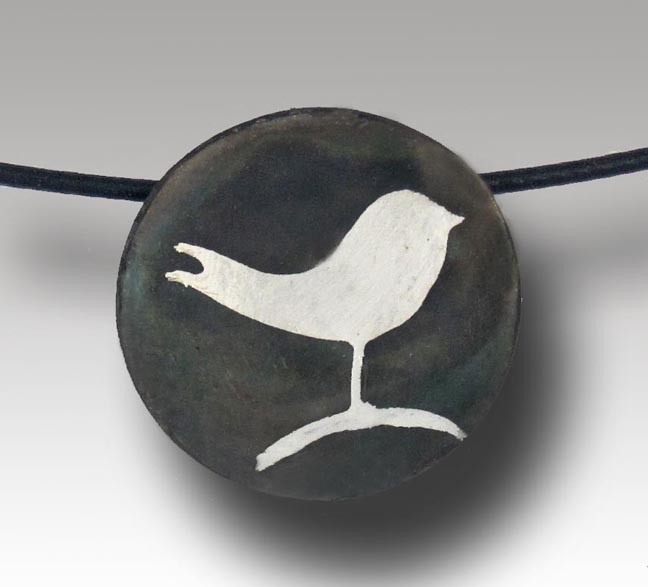
In the never-ending pursuit of hollow forms, I’ve been working over the past year on a new way of creating them. In fact, this way is the opposite of any hollow-form technique I’ve been using so far. Instead of building up the forms from layers of wet clay, I treat dried chunks of clay as if they were rocks or chunks of wood and carve the forms into them. Carving may be a misnomer, since this term is usually conceived as surface decoration. In this case the carving is structural, and there is no surface decoration. The surface of the pieces is either solid-smooth or perforated.
Sculpting by subtracting material rather then adding it, as done in wood and stone sculpture, requires some adjustment of our brain muscles, since it makes us think “in reverse.” This is not an easy task, but the results are so rewarding! Once you start using this technique, new ideas keep popping up and endless possibilities open. Many things that are very hard or impossible to make in metal clay because of the nature of the wet clay and its consistency, are made possible in this way of sculpting.
The photos below are samples of what I’ve done so far. I will keep posting as new techniques come up.
I’ve scheduled two sculpting/structural carving workshops for 2017. These are 5-day intensives taking place at my studio in Berkeley, CA.
January 12-16, 2017: this class is currently full. Please email me at hadarjacobson@gmail.com if you wish to be on the wait list.
February 22-26, 2017. This class is still open. Please sign up here by paying the deposit.


18 comments
Mar
18
2016
My next 5-day intensive will take place on October 6-10, 2016, at my studio in Berkeley. You can sign up by paying the deposit on the Classes page of my online store. Upon signing up you will receive a list of tools to bring to class, a map of the area, and a list of places to stay near the studio.
What is covered in this workshop
Preparing different types of forms for different types of inlay
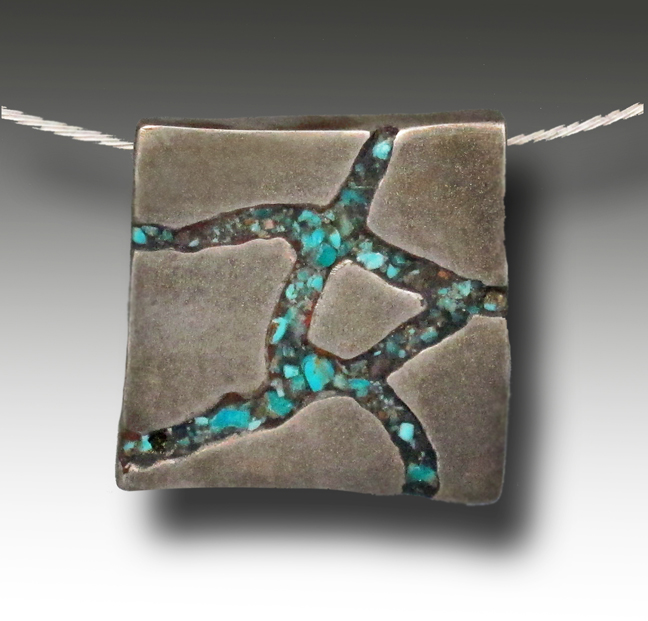
Here are a few class samples (more may be posted later):
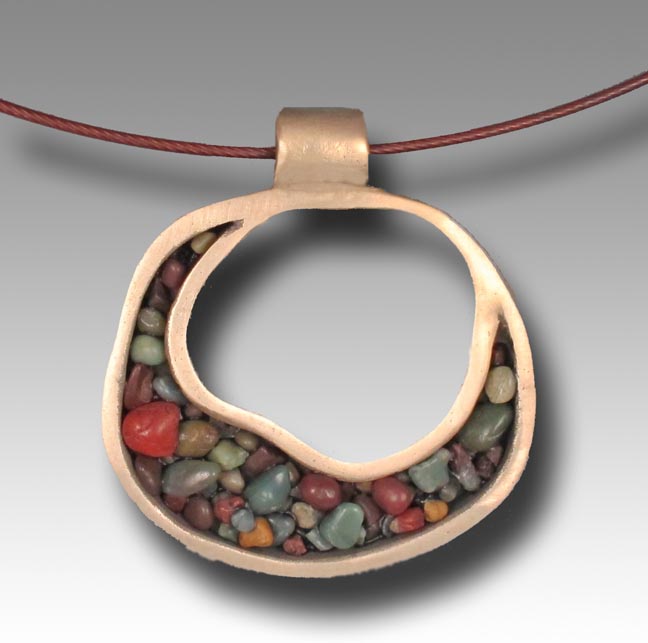
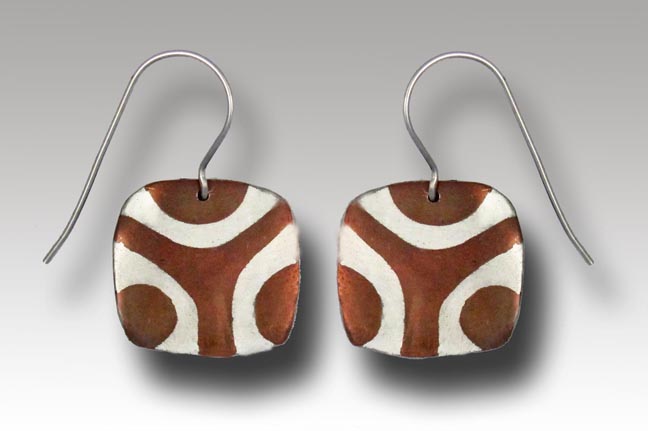
Rock inlay

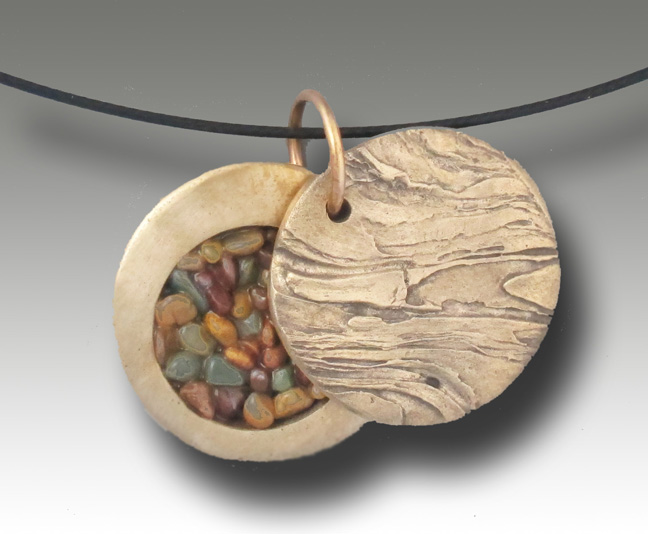
Chip (crushed stones) inlay
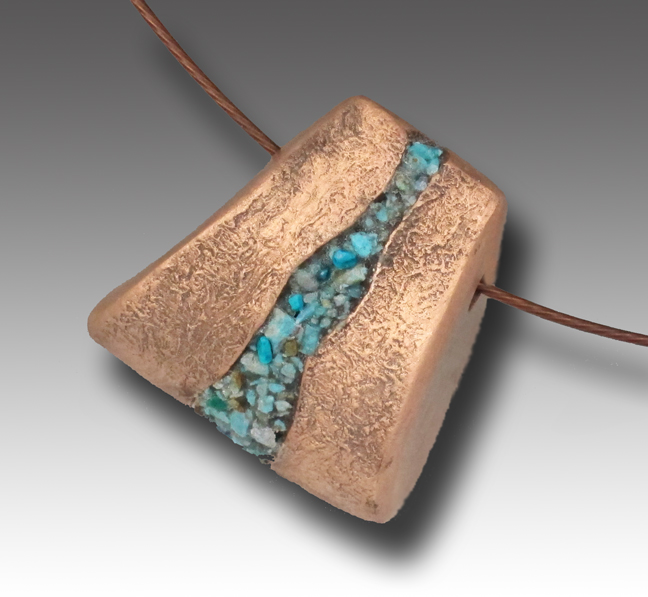

![t-Mosaics coppe1]](http://artinsilver.com/blog/wp-content/uploads/2016/03/t-Mosaics-coppe11.jpg)


Cold inlay powder


5 comments
Mar
7
2016
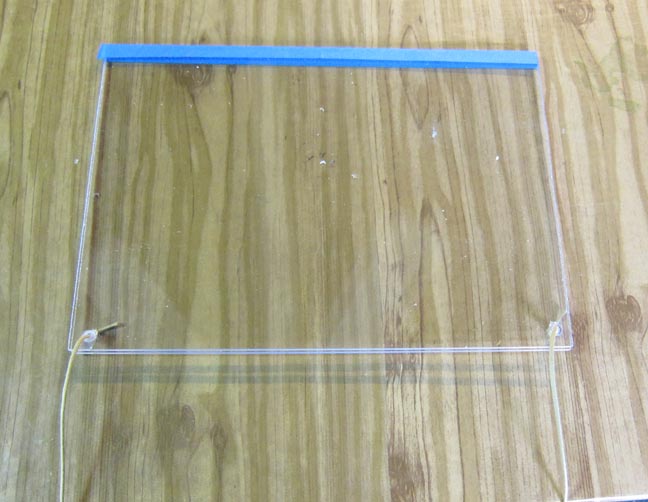
To protect ourselves from dust when we sand or use the rotary tool we need to wear both a protective mask and goggles. However, most of the time the goggles fog up and we can’t see what we are doing. Here is an easy way to make an acrylic box that will protect your nose, mouth and eyes.
What you need:
- Two acrylic sheets, any size you wish. Mine cost a total of $3.
- Drill bit
- Painter’s tape, duct tape or gaffer tape
- Cord
Instructions:
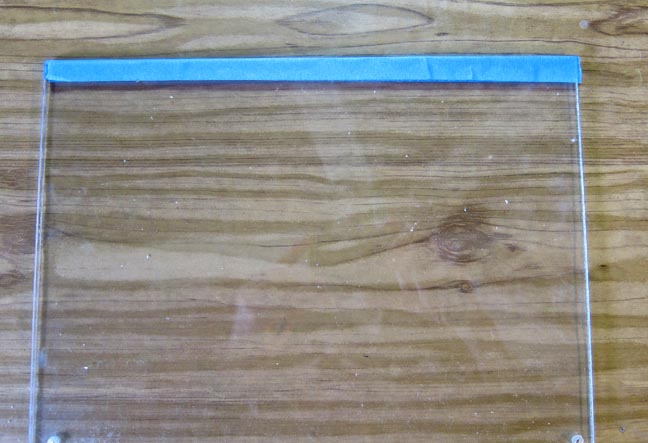
Tape the two sheets together so they completely overlap.

Drill a hole on the bottom right and bottom left of the two boards.

Make the two sheets into a folder by taping them together at the top.

(The following idea came from my husband, Avi): Cut 2 pieces of cord and tie a knot at the end of each.

Close the folder and insert each cord through the holes of both sheets.

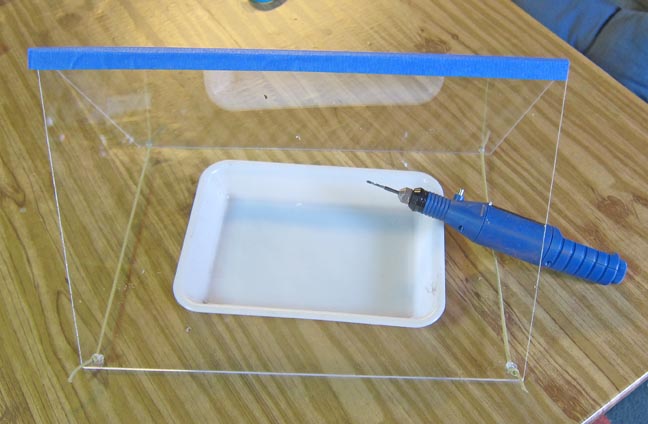
Open the folder and position it on the table. Insert your hands through the sides of the folder to determine how wide the opening should be.

Tie another knot at the end of each cord.

The box is ready to use.
Fold the box and take it with you to class.
4 comments
Feb
10
2016
The best answer for the third multiple-choice question is #3: A married metal piece of jewelry is piece that includes more than one metal with seamless transition from one metal to another.
Comments Off on Answer to the Third Multiple-Choice Question
Feb
7
2016
What is a married metal piece of jewelry?
1. A piece that includes more than one metal.
2. It’s the same as mixed metal jewelry.
3. A piece that includes more than one metal with seamless transition from one metal to another.
4. A piece that combines two or more metals that cannot be fired together because of differences in firing temperatures.
5. It’s the same as mokume-gane.
6. A piece in which two metals blend together to create a metal whose color is different from the original ones.
7. A piece in which different metals are arranged next to each another like mosaic work.
Which is the best answer?
Comments Off on Third Multiple Choice Question
Feb
4
2016
Two weeks ago a new feature was added to the Hadar’s Clay™ Users Discussion Forum. I am adding this feature to the blog and will also post it on my Facebook page. The Users Discussion Forum is a wonderful tool for sharing information, discussing issues, and showing your work. As of today there are currently 935 members. You are welcome to join.
Here is the new feature: Every week, on Sunday, a multiple-choice question is posted. The posted questions may range from beginners’ level to accredited teachers level. Some of them may sound obvious; some may sound complicated. The suggested answers to each question may be incorrect, partially correct, or reasonably correct. However, there is only one correct answer, which is the best answer.
You don’t have to post your answer. These questions are meant for you to test yourself and clarify issues regarding the nature and use of Hadar’s Clay and other brands of base metal clay. I will post the answers halfway through the week, so you can compare your answer to mine. Then, if questions arise, you can post them on the Users Discussion Forum, on this blog, or on my Facebook page, or you can email them to me and I will post and answer them without disclosing your identity. You are welcome to discuss the questions and the answers. You are also welcome to email me questions that you would like to see discussed.
Here are the two questions and answers that have already been posted on the Support Forum. The third question will be posted this coming Sunday.
First question: Can you fire Hadar’s Clay with a torch?
1. Yes.
2. No.
3. Yes, but you need to do it for at least one hour.
4. Torch-firing Hadar’s clay is not recommended.
5. Only One-fire Copper can be fired with a torch.
6. You can fire base metal clay with a torch, but then you need to re-fire in carbon.
7. You can fire base metal clay with a torch only if you manage to cover the whole piece with the flame so it is not exposed to oxygen.
The best answer is #4.
Second question: True or false: Pieces cannot sinter under carbon because the binder has no oxygen to burn out.
1. True.
2. Not true: there is always enough oxygen under the carbon for the binder to burn out.
3. It depends on how much carbon there is on top of the pieces.
4. It depends on the type of carbon.
5. Above a temperature of 1000°F (brick)/1100°F (muffle) there there may not be enough oxygen in the carbon for the binder to burn off.
6. It depends on the total amount of carbon per number of pieces.
7. It depends on how many times the carbon has been used.
The best answer is #5.
Comments Off on New Feature: Multiple-Choice Questions
Nov
10
2015
[UPDATE: By popular demand, in addition to the intensive described below, I have added another intensive on March 11-15, 2016. You can sign up for the March intensive directly on my Online Store.]
Since my January intensive is full, I have scheduled another one for January 2-6. This 5-day intensive takes place at my studio in Berkeley, California. In this workshop no commercial or pre-made textures and forms will be used; you will be making your own molds and textures for constructing unusual forms and decorating your creations. Different techniques for color and inlay will be included if time allows.
The full cost of the intensive is $500 plus materials. You can sign up here. Upon signing up I will email you the exact address, a list of tools to bring, and places to stay. You can ship your tools to my studio ahead of time.
This workshop is intermediate to advanced and recommended to people with experience with Hadar’s Clay.
Feel free to email me with specific questions at: hadarjacobson@gmail.com.
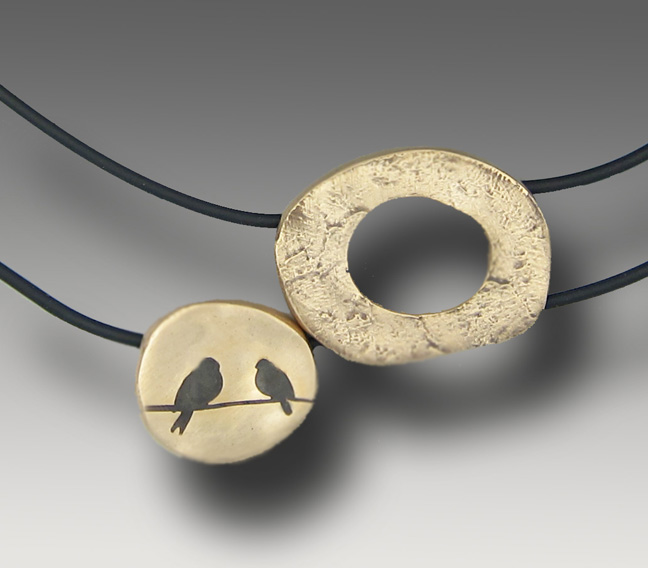
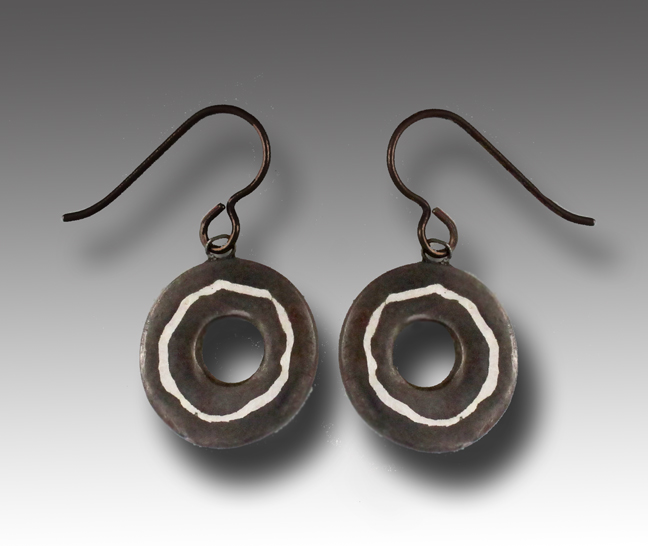
Here are a few photos representative of what we will be doing at this workshop. The samples include drawer knobs, salt and pepper shakers, push pins, mini pots, door knocker and switch plate covers but you can use these techniques to make jewelry objects.
Hand-made texture, color and inlay:


Hand-made texture and color:


Perpendicular overlays with Flex Clay:

Twisted forms:

Bent forms:

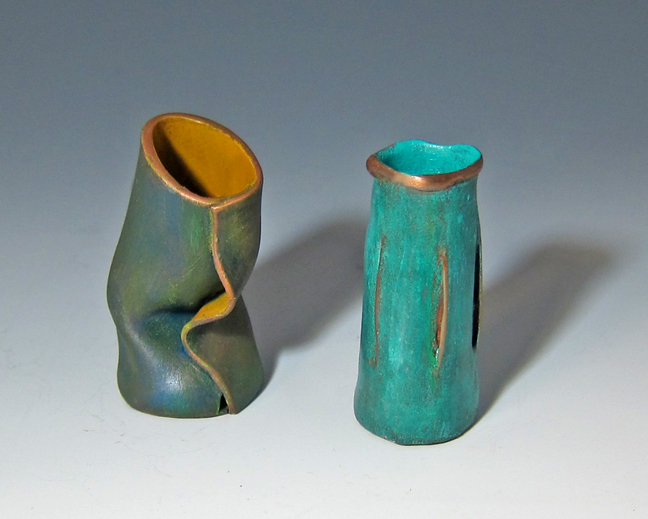
Collapsed forms:

Flared forms:

Forms made with a new mold material:

Salt and pepper shakers:


Door Knocker:

Push pins:


Switch plate covers:


1 comment
Oct
6
2015
One-fire Flex Pearl Grey Steel is now available on our online store. This completes the release process of the One-fire Flex Clays, which include One-fire Flex Copper, Brilliant Bronze, Dark Champagne Bronze, Rose Bronze, White Bronze, Low-shrinkage Steel XT, White Satin, and Pearl Grey Steel.
Please download the Instruction Manual for One-fire Clays by clicking on the link in this sentence, or directly from the right-hand panel of my blog. The instructions for One-fire Flex clays are on pp. 7-8.
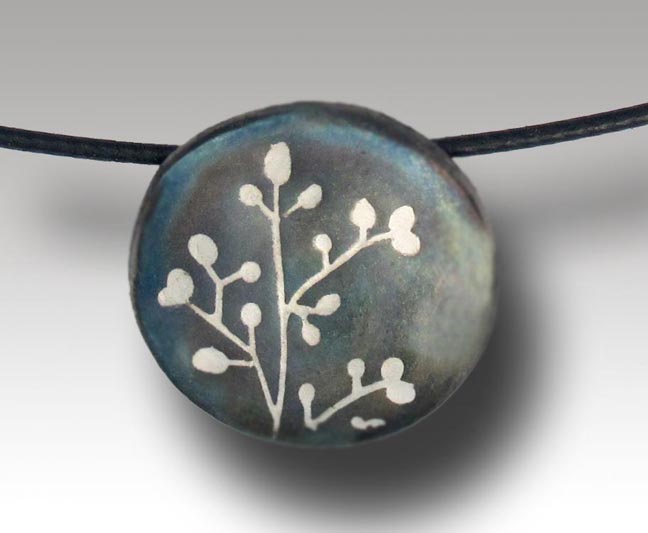
One-fire Flex Pearl Grey Steel works best in combination with other metals (One-fire Bronze or Brilliant Bronze and one-fire Copper) for color effects (caning, mokume-gane, and gradients). The photos below show One-fire Flex Pearl Grey Steel as part of a gradient surface, fired at mid-fire schedule.


The following photos show One-fire Flex Pearl Grey Steel fired in a stripe pattern with One-fire Copper and Brilliant Bronze at mid-fire schedule.


Information about creating patterns of color such as canning, mokume-gane, stripes and gradients can be found in my books Patterns of Color in Metal Clay and Metal Clay Practice.
One-fire Flex Pearl Grey Steel can also be fired on its own at 1750°F but will be too hard to bend and drill. To fire steel on its own it is recommended to use Low-shrinkage Steel XT.
Comments Off on One-fire Flex Pearl Grey Steel is Now Available!