Photos from a Workshop in San Diego
I’ve just received photos from the workshop I taught last month in San Diego with the Metal Clay Alchemists Society. It was a my first travel-teaching class for this year. What a great start! I can’t wait until I get back there in November. Everybody worked under a lot of stress, since we started early in the morning and had to be out of the facility by 4:30pm. However, we got a lot done. Here are photos of some of the pieces. I apologize in advance for not being able to give credit to the people who created them.

Pieces straight from the kilns

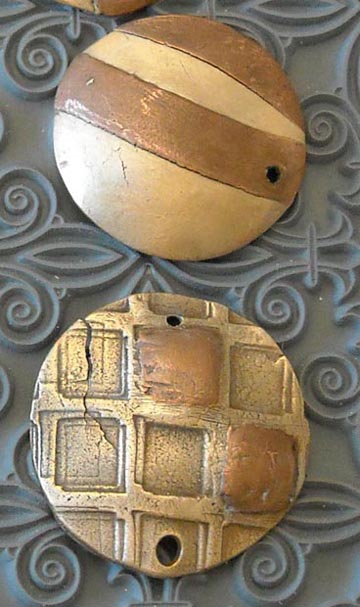
Before finishing
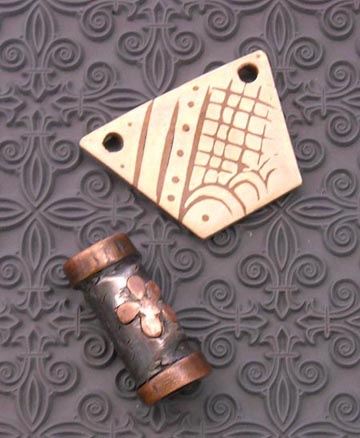
After finishing


The piece on the top right is a combination of inlay and overlay techniques. The one on the bottom left is syringe work of silver paste over copper.


Even I thought that these earrings should stay the way the came out of the kiln without doing any finishing. I hope the colors last a long, long time.

Pieces after finishing
And here are some photos of us:


July 8th, 2009 at 10:25 pm
great stuff hadar so looking forward to our classes with you here in Melbourne, The colours on those last earrings are awesome – are they copper clay?
July 9th, 2009 at 12:55 am
What a wonderful group and what cool pieces they all made ! I’m sure it was an exciting experience for all. Wonderful, as usual, Hadar !
Angela
July 9th, 2009 at 4:03 am
Makes me “homesick” for a visit with Hadar! Great looking pieces… hugs from Holly
July 9th, 2009 at 4:14 am
Beautiful! I was just getting ready to email you for the first time, when I rec’d your update. I’ve had my copper clay for a couple months, but I just had time to devote to my first experimenting yesterday. I found your website when googling for info. I fired my first batch last night, and I guess for first it wasn’t too bad, but out of the kiln it was black and when cleaned it just looks like steel. I fired at 1700 for 3 hr., like I thought I had read somewhere, but I think my kiln must run hot. My guess is that I burnt them. What do you think? I don’t think I can attach a picture to this, but it looks nothing at all like copper, just a dark steel gray. Instead of doing several pcs again, I think I’ll just do one at maybe 1650 for 2 hrs this time. I’ve got 1 28 gram pk of silver I’ve been saving. I’m going to experiment with this copper and get it right before I touch that! Thanks for all the info you’ve put out, it really helps.
July 9th, 2009 at 5:26 am
I just read more info under how to use your clay and discovered that the way you tell to fire is totally different from what I did. I used Rio Grande’s instructions. Higher temp and lid was on. Next time I’ll use yours. I had found several others similar to RG but more complicated, so I settled on RG. I guess I can enamel on my burnt pcs! I love your patina, too.
July 9th, 2009 at 7:58 am
Carol,
They are combination of copper and bronze clay. It’s important to keep in mind though that the colors are not guaranteed and will not last forever. In most cases, combination pieces are sanded smooth and rubbed with patina to highlight the contrast between bronze and copper.
July 9th, 2009 at 8:43 am
how fun, great pieces!
July 10th, 2009 at 4:53 pm
Hadar, thanks so much for sharing this workshop! I would love to know how you managed 19(?)students so easily, since the final picture shows a truly joyful, smiling Hadar!
Sarah Triton
July 11th, 2009 at 11:20 am
Hi Sarah,
Actually 20, one was taking the photo and is included in the other photo on my email message. I’ve been teaching classes this size for about eight years now so I am quite used to it. I was just happy to see all the different, unexpected interpretations that people gave to the projects I gave them to work with. A lot of them are not seen in the photos. I was also happy that they were happy.
Hadar