Another Project for the ClayMill Extruder – Part III
The ClayMill Extruder comes with 5 dies. What is the serrated (zigzag) slot for?
One technique in traditional Damascus steel and mokume-gane is to emboss the layered sheets of metals (the billet) to about a third of their thickness and then file off the raised parts to reveal the pattern. The die with the serrated slot mimics this technique. There are major differences, though:
1. In traditional Damascus steel and mokume-gane several sheets of different metals are layered one on top of the other. Therefore, when embossing into the same depth at different spots of the billet, the same pattern will be exposed. This can easily be illustrated by stacking layers of polymer clay instead of sheet metal, embossing the stack with a V-shape wood carver, then removing the raised part. The extruder produces a cane, or a stack, that consists of layers of different clays. However, they are not arranged one on top of the other; when embossing into the same depth in different spots of the cane, different patterns of color will be exposed. The pattern will always change along the cane.
2. In traditional Damscus steel and mokume-gane the billet is created first and then the embossing is done. The extruder, in combination with the serrated slot, does both at the same time: it extrudes a cane that is indented to almost a third of its thickness by the sharp edges of the slot. Then the raised parts are removed to reveal a pattern of color.
Here is a project, entitled Color-patterned Hair Band, which illustrates this technique.

Materials: Quick-fire copper, Quick-fire bronze, Quick-fire steel (any kind).
1. Place the die with the serrated slot in the cap of the extruder.

2. Make a stack of alternating circles: 2 copper (6 cards thick), 2 bronze (3 cards thick), and 2 steel (1 card thick). This stack weighs about 80 grams, including the water. Use a circle cutter about 1¾” in diameter. The diameter should be just slightly bigger than the slot.

3. Extrude the stack with the copper circle coming out of the slot first.

4. Using a craft knife or a tissue blade, remove the high parts of the cane. It is not necessary to create a perfectly flat layer since some sanding will be done later.

5. Using craft sticks, correct any distortion by shaping the cane into a rectangle.
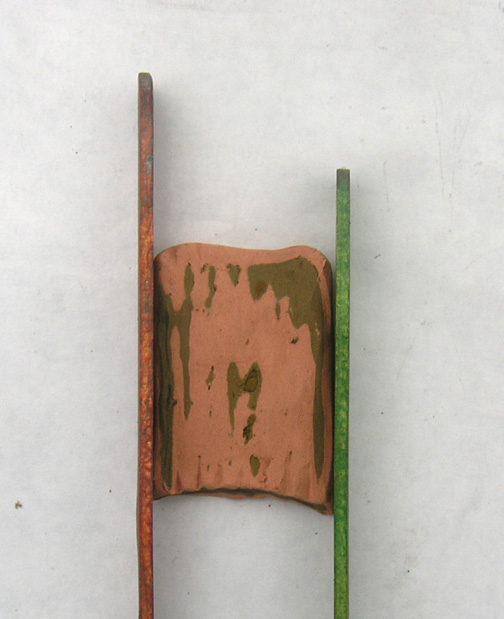
6. If you wish the rectangle to be longer, roll it down between the two craft sticks.

7. Curve the cane on a cylinder-shaped mold such as a dowel, and dry.

8. Sand the surface smooth to reveal the color pattern.

9. Make the stick: roll a thick copper snake. Place the piece on top of it to measure the length, and cut it so that it protrudes past the shape by about ½” on
each side.

10. Press on one end with your finger to flatten it. Dry and sand it to the desired shape.

11. Drill a hole on each side of the hair band. Make sure the holes are big enough for the stick to fit through.


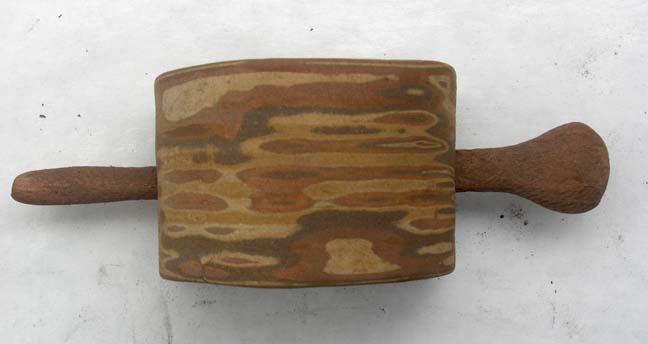
12. Fire the band at mid-fire schedule. Fire the stick at high-fire schedule. Follow the firing schedules in the Instruction Manual (also available in the right-hand pane of this blog).
13. Finish the piece following the instructions in the document entitled “Finishing Fired Metal Clay” on my blog (also available in the right-hand pane of this blog).

January 13th, 2013 at 8:00 pm
Hadar you continue to amaze me with your creative work, constant sharing of techniques and allowing me to walk this journey with you.
January 13th, 2013 at 8:33 pm
Another wonderful project, Hadar! Did you make your own die with the serrated edge? It does not come with the Claymill extruder.
January 14th, 2013 at 8:27 am
Liz, I am told that this die will be available soon. I must have used the prototype.