Apr 18 2011

Bead Extruder

The tube adapter allows us to extrude tubes in different sizes and shapes, so we can make bails and hinges. There is one drawback to the commercial tube adapters that are designed for metal clay. We can extrude tubes only up to a certain size, although some of our discs have bigger holes.

For example: Here is the biggest square available in out set.

However, it is impossible to extrude a bead of this size. Here is why: When you place the disc on top of the holes you can see the 4 round holes of the tube adapter.

If you try to extrude with this combination of a hole and adapter, what will come out of the extruder is 4 snakes rather than a big square bead.

In order to extrude one tube or bead, the holes of the adapter should be invisible.

This, of course, is a much smaller square, and it will make a very small bead.

My thought was that if an adapter could be made with holes that were closer to its perimeter, it might be possible to extrude a larger bead. I tried a few designs, and so far this one seems to work best.

I made it from a brass sheet. You can try to make it from bronze clay, but I am not sure that metal clay is strong enough to withstand the pressure of the extrusion. This one bent while extruding. Also, it shouldn’t be too thick (over 4 cards), since that will make it impossible to screw on the cap of the extruder.

This adapter works with a screw mandrel.

t-06

Here is the adapter upside down, with the mandrel sticking upwards. A thin rubber O-ring is placed on the adapter to create some space between the adapter and the disc and to allow the flow of clay.

Here is the disc with the bigger square hole, laid on the adapter.

The holes are invisible, and it does work. Now all we need is someone to manufacture it for us.

An O-ring or a separate metal tube with the same diameter as the disc, separating the disc from the adapter, works better than the current commercial design of the adapter. After extruding, it is much easier to clean up.

Note: Since this information has been passed on to more than 200 people by publishing it on this blog, it is now considered public domain.


Apr 4 2011

Sterling Silver Clay, Copper Clay, and Mokume-Gane

After my blog postings about Sterling Silver using Quick-fire Copper and about Copper and Silver Mokume-gane, the next step for me was to play with making mokume-gane from sterling silver clay and Quick-fire copper. (See instructions for making sterling silver clay in my posting: Sterling Silver with Hadar’s Clay™ Quick-fire Copper. Here are some of my results. The first attempt is a pair of mirror-image earrings.

Before

Before

After

After

Before

Before

After (one side)

After (one side)

Other side

Other side

To my surprise, the lentil sintered without repeating the second phase of firing.

Here is an experiment with a gradient surface:

And Cabochons:

These are double-sided spinning earrings. They are small, but pretty thick. They also sintered without repeating the second phase.

One side

One side

Other side

Other side

This time I fired in both my kilns, front-loader muffle and top-loader fire brick. I used a ceramic cloth, which is the same as fiber blanket as far as temperatures are concerned. The firing schedule is exactly the same as for copper and White Bronze (how convenient – and weird!). In some cases I skipped the first phase by firing the pieces with a torch on top of the carbon. (I don’t recommend doing this with thin, flat pieces, since they tend to break, and I am not sure it can be done with White Bronze). When I didn’t skip the first phase, I fired in carbon for 30 minutes.

The temperatures for the second phase:

Top-loader brick: 1250°F/677°C;
Front-loader muffle: 1325°F/718°C.

I am going to repeat this schedule several times before updating my instruction manual (again?).

I did not find any difference between firing Quick-fire Copper with fine silver or with sterling silver. The metals seemed to fuse at the same temperatures.

I did find shrinkage issues with both fine and sterling silver. In some pieces that had a silver backing layer, the backing layer curved backwards because of greater shrinkage. This could be due to the brand of silver I was using. You can try silver clays with lower shrinkage rate. With the price of silver today, I am not sure I can afford it.

Advice: if you try, test first. Start at a low temperature, sand to check sintering, and if the piece has not fully sintered, repeat the second phase. If it still hasn’t sintered, gradually raise the temperature.

Warning: Do not fire silver and White Bronze in the same box. If you want to test them both in one firing, use two separate boxes.


Apr 2 2011

Copper and Silver Mokume-gane from Metal Clay

I didn’t think it was possible to make mokume-gane with a combination of copper and silver clay. I knew that the two metals won’t stick to each other, and if they do, they will alloy into a messy blob. I did try to make a gradient surface with copper and silver and ended up with sad results. But then someone asked me “Have you tried?”, and since then I couldn’t get the idea out of my head.

What if, I speculated, I fire at such a temperature where the two metals start to bond but not alloy yet? If this works, then it’s all about finding the correct temperature. (Whenever I ask my husband for his opinion on issues like this, he says: “firing schedule.”) The piece featured in this posting is my first attempt, no loss of silver whatsoever. Here is what I did:

I made the piece (see more information below).

I used a front-loader muffle kiln with a fiber blanket box. I fired the first phase on top of carbon: full speed to 1100°F/538°C, holding 10 minutes. To be safe, I fired inside carbon for 30 minutes. This is how it looked after the fires phase:

If I had made this piece with White Bronze (which I have done in the past), the White Bronze part would look almost as dark as the copper. You can see how white the silver areas are.

Then I started the second phase at the low temperature of 1200°F/650°C. Fired for 2 hours in carbon. I did not try to break the piece! Since the backing layer is copper, which is hard to sinter at this temperature, I sanded the back of it with 220-grit sandpaper. I saw some powdery areas.

I raised the temperature 20 degrees at a time. Each time I fired about 1:30 hours. The piece was fully sintered at 1320°F/716°C.

.

The mokume-gane part is treated with Baldwin’s Patina.

The question is: did the piece sinter because it was fired at the correct temperature, or because it was fired so many times?

When I fire mokume-gane with copper and White Bronze, I repeat the second phase of firing, to compensate for the low temperature. Surprisingly, in my front-loader, I fire White Bronze at exactly this temperature (1320°F/716°C). I am going to assume that what made it work is both temperature and repetition, so in my next attempt, I am going to use exactly the firing schedule that I use for copper and White Bronze (all firing schedules can be found in my instruction manual).

As for constructing this piece: regretfully, I cannot give instructions here for making this mokume-gane design and others because this is what I currently teach in my travel-teaching workshops, and it would be unfair to the people who pay to take these workshops. As far as I know, there are still a few spots available is my workshops in Dallas (with PMC Connection), TX; Brighton, MI and Saint Joseph, MI; and Rochester, NY (for details see my travel teaching schedule). There is also room in my Intensive classes at my studio. The rest of the workshops seem to be full.

Or, you can wait for my upcoming book, which includes more than 50 projects for different mokume-gane designs and techniques.

My thanks to Mary Ellin D’Agostino for her tips and suggestions.


Mar 31 2011

Sterling Silver with Hadar’s Clay™ Quick-fire Copper

Congratulation to UK metal clay artists on making silver clay that can be Hallmarked 925 silver! I was glad to hear about this via email while teaching in Ohio, and couldn’t wait to read the article in Metalclay Artist Magazine. I was surprised to read, though, that the testers had no success with my clay. So, for my customers in the UK, I tried. I made it with PMC+, since that’s what I had at the moment. I measured according to the instructions and blended. The consistency was nice and not sticky. After a night in the refrigerator it had a yellowish film on it:

I kneaded it a little and it regained its consistency. The ball in the photo weighs 20 grams. I made two rings and have some left over.

Then I made a ring. I used a wooden dowel with ring size 9.

.

I made the ring around it, 2 cards thick (with fine silver I have never done a ring less than 4 cards thick). I removed the ring when it was half dry and continued drying. After drying, it shrank and did not fit the dowel anymore.

I placed the ring in a mixing bowl half full of carbon and started heating it with a torch.

Once the binder caught fire, I removed the torch and let the binder burn on its own. The photo below shows the burning in a second experiment that I did, in a mini-kiln made from fire brick.

Once the fire died, I covered the ring with carbon and placed it in a front-loader kiln. (I assumed that this is the type of kiln the testers used.)

I fired for 1 hour at 821°C/1510°F. Here is the ring, right out of the kiln:

The ring shrank to size 6.5 and appears to be very strong. I oxidized, sanded, and polished.

(Not a masterpiece, I know; it was just an experiment.)

Firing the other ring in a top-loader inside a mini-kiln required a lower temperature. I fired a little lower than 821°C/1510°F, and still it seemed that the silver started to melt. I sanded it with a heavy-grit sanding band and it’s ok now. I would suggest starting by test-firing in a top-loader as low as 1400°F/760°C.

t-2 ri

So why didn’t it work in the UK? My only guess is that the testers may have used my Traditional Copper powder, not the Quick-fire version.

I also have a suggestion for more accurate measuring. When the two clays are mixed with water, there is no way to compare the amount of water in them. For example, one of the clays may be dryer than the other, and will weigh less than it would have if it were as moist as the other clay. Dry the silver clay that you are about to use, until it contains no water at all. With a dedicated coffee grinder, grind it to a powder. Then weigh the powdered silver and the Quick-fire Copper powder and mix them together. Then add water to the mix.

In any case, I am very happy for you over there on the other side of the pond! Hope to meet you again sometime!


Mar 14 2011

Call for Entries

My fourth book is coming along pretty quickly and will hopefully be available late this summer. The title is: Patterns of Color in Metal Clay: Canes, Gradients, Mokume-Gane.

The techniques introduced in this book are inlay, bulls-eye canes, mokume-gane, wood grain (a specific instance of mokume-gane), stripes, gradient surfaces (in which one color gradually blends into the other), and mixing colors (to create rose gold colors and other golden hues). There is a partial overlap between bulls-eye canes and mokume-gane. The clays used are bronze, copper, White Bronze, and Pearl Grey Steel.

When I started exploring color patterns, my first instinct was to study polymer clay techniques and apply them to metal clay. I soon realized that in most cases it doesn’t work. The main reason is that metal clay is fired at a high temperature, and that causes some alloying between adjacent metals. Colors seen before firing may be very different from those seen after firing, to the point that the technique used does not accomplish its goal. The book offers alternative ways of achieving color patterns similar to those achieved with polymer clay as well as new ones.

This is mainly what I have been teaching in the past year in my ongoing classes, intensives, and travel-teaching workshops. Teaching this material hands-on in different parts of the world helps me realize what problems readers may encounter while reading the book, and what projects appeal to people most. This experience helps refine the projects, adjust them to readers’ needs and preferences, and answer potential questions.

So, if you have taken one of my workshops or intend to take one in the near future, you are welcome to submit your work to the book. There is still plenty of time, and I am usually able to add photos just before it goes to the printer (please don’t wait until the last minute, though). Please have a look at my Travel-Teaching-Schedule for workshops offered in the next few months. (The July intensive’s dates have been corrected: it’s July 2-6).

Here are some photos from the last intensive. (As usual, no names. Full credits will be published in the book.)

02


Mar 2 2011

Shortening the Time Between Phases – Follow-up

Before I started to shorten the time between firing phases, I did not have a chance to check the pieces after the first phase, since I had never taken them out of the carbon. Now that I have done it quite a few times, I can tell that there is an important difference between the clays at this point (after the first phase), and if you are not aware of this difference, you may end up destroying your piece.

Bronze and White Bronze are quite stable after the first phase of firing, and if you handle them carefully (light touch, no tweezers), they should be fine. This is not the case with copper, and even less so with steel. These two metals are so fragile at this stage that they may break as a result of even the slightest tilt of the box when you take it out of the kiln (not to mention the effect of actually touching them).

The first phase is meant to burn away the binder. At the end of this phase, there is actually nothing to hold the metal particles together. The removal of the binder allows the particles to get closer in the second phase, until they actually bond and become a solid mass. This is why the pieces are so fragile at the end of the first phase. It seem a miracle that the do stay together.

For now, I would like to avoid discussing why bronze and White Bronze are less fragile after the first phase. I would be glad to discuss this in actual workshops. The point is that you need to be extra careful with copper and steel, and if you don’t trust yourself, just take the box out of the kiln carefully and let it cool naturally. It is recommended to use rigid boxes that don’t wobble, as a ceramic blanket is likely to do – you can use a fiber board box, or even a mixing bowl (just remember to adjust the temperature for each type of box).

Firing Steel and Copper

If your piece is constructed of steel or copper, or a combination of steel and copper, with no bronze or White Bronze in it, fire at 1650°F/900°C, as the updated Instruction Manual suggests. They will not be very strong at a lower firing temperature.

When we fire them with bronze and White Bronze, we are actually under-firing them since bronze and White Bronze will not tolerate such high temperatures. In that case, it’s the bronze or White Bronze that give the piece its strength.

To quote the unforgettable Sgt. Phil Esterhaus of Hill Street Blues: “Let’s be careful out there!”


Feb 26 2011

Shortening the Wait Time Between Firing Phases

The waiting time between the two firing phases can be shortened to less that half an hour. I took many photos of the process to make it as clear as possible, but the whole process, including taking the photos, took 30 minutes.

The kiln finished the first phase. Hold time was 1:00 hour because the pieces were large. Temperature was 1000°F/528°C (top loader). I opened the kiln right away.

A mixing bowl was waiting, empty.

I placed a sieve inside it.

I filled the bowl halfway with cold carbon.

Wearing heat protective gloves, I took the firing box out of the kiln.

Again, wearing heat protective glove, I started pouring the content of the box slowly into the sieve.

The pieces fell onto the soft carbon, which protected them from breaking.

Once the firing box was empty, I held the sieve and slowly lifted it out of the bowl.

I set the sieve aside to cool down the pieces. The temperature outside was about 50°F (10°C). After 5-10 minutes the pieces were cold to the touch.

I re-filled the box with cold carbon.

I carefully picked the pieces out of the sieve with my fingers and placed them in the cold carbon. (On another occasion, I saw a crack on one of the pieces. I was able to mend it carefully without breaking the piece).

I put back the rest of the pieces, then poured cold carbon on top of them.

Now all I had to wait for was for the kiln to cool down to about 250°F/120°C. I put the box back in the kiln and went on to the second phase. As I said, about 30 minutes from beginning to end, including all the pauses to take pictures.


Feb 22 2011

Updated Instruction Manual and a New Workshop

A new workshop has been added to my travel-teaching schedule on June 3-5, at PMC Connection, Dallas, TX

To sign up please contact: Contact@PMCConnection.com
Phone: 866-PMC-CLAY (762-2529)

Address: 2414 East Highway 80, Suite 190
Mesquite, TX 75149

You can see the workshops that I will be teaching this year in the document entitled “Hadar’s Travel-Teaching Schedule” in the right pane of this blog. All of these workshops are about patterns of color in metal clay, which is also the tentative title of my upcoming fourth book. If you have taken this workshop or are about to take it, you are welcome to send me photos of pieces that have been inspired by it.

Updated Instruction Manual

The Instruction Manual for Hadar’s Clay™ has been updated. You can see it in the right-hand pane of this blog, as well as on my online store.

The firing schedules have been simplified and are easier to follow. There is also an added section suggesting how to pre-set 4 programs on your kiln. You can find it in the Table of Contents.

Program 1 is for the first phase of all the clays.

Program 2 is for the second phase for copper, bronze, and Pearl Grey Steel, as well as for all types of silver clay!

Program 3 is for the second phase of White Bronze.

Program 4 is for the second phase of regular steel.

The default firing schedule for all base metal clays is a 2-phase one. I have tried it with other brands of clay and it seems to work well.

Important reminder: the suggested firing schedules are based on firing in a fiber blanket box, about ¼” thick. They may not apply to new commercially available firing boxes. Fiber boxes, for example, require lowering the temperatures by at least 30°F/17°C.

Update: A typo was discovered in this Instruction Manual, in the firing schedule on p. 30. The typo has now been fixed. If you downloaded it before 5:15 pm Pacific Time on February 22, 2011, please download again. Thanks!

Please go over the instruction manual. With every shipment of my clay I send an email that directs to the instruction manual. Still, I am getting a lot of emails from people who are unaware of the manual and just Google instructions. As a result they get contradicting pieces of information and have lots of failures in firing the clay.

I will be also glad to receive your feedback and make changes to the manual as needed. If something is unclear, or missing, please let me know.


Feb 11 2011

Firing Issues

First, a class update: a 2-day back-to-back workshop has been added to the workshop in Chicago, at the Local Metal Clay Guilds and Chapters. The added dates are April 11-12, 2011. Please contact: Katie Baum at katie@artclayworld.com to inquire about available places.

There is also still room in the May intensive at my studio (May 7 – 11).

I’d like to address a few issues that have been raised.

Carbon Turning into Ash

If you fire overnight and in the morning you find your pieces exposed and most of the carbon has turned into ash, it’s not a good thing. First, you lose a lot of carbon. Second, your pieces are exposed to air and heat (who knows for how long), and are at risk for being oxidized or over-fired. There could be a few reasons for that:

1. Some carbons stay hot for a long, long time after the firing is over, even outside the kiln. Try to switch to another type of carbon. The carbon should be coconut-shell based, acid washed, size 12 x 40.

2. Some kilns stay hot for a long time after the firing is over. In that case, don’t fire overnight. Take the box out of the kiln as soon as the firing is over. Covering the carbon loosely with a fiber blanket box helps to some extent, but does not solve the problem.

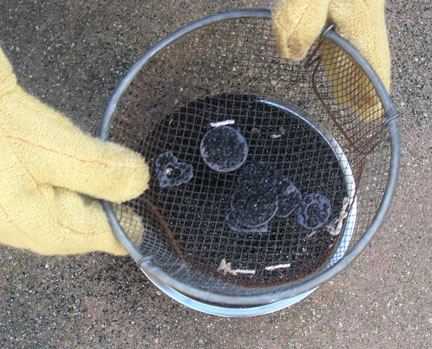
3. The new fiber box does not cool down for a long time (even outside in the snow, as has recently been reported to me). It is not recommended for overnight firing. Take it out of the kiln and empty it out as soon as the firing is over. The box also takes a long time to cool down between the first and the second phase. Try to find a way to pour out some carbon until you see the pieces. They will cool down faster when exposed, and then you can carefully pick them up with your fingers (don’t use tweezers or the pieces will break!) and lay them on a soft surface such as a fiber blanket. Empty the box and re-fill it with new, cool carbon. Put the pieces back in, cover them with carbon, and proceed to the next phase. Remember that in the second phase you need to fire 30°F lower than in a fiber blanket box.

Note: if your pieces get oxidized, there is no need to pickle them. Just put them back in the carbon and re-fire for about one hour.


Testing the Kiln

When I go to teach in an unfamiliar venue, I’ve gotten into the habit of testing all the kilns the night before. What I want to find out is whether a certain kiln is under-firing or over-firing when I use my regular firing schedule. Under-firing can be fixed by re-firing; over-firing cannot. Here is what I do:

For each kiln I prepare at least 4 test pieces: 1 bronze, 1 copper and 2 mixed piece – one mostly copper, and one mostly bronze. The surface of all the pieces (including the mixed ones) is smooth and flush.

As a starting point, I use the firing schedule from my instruction manual, using a fiber blanket box. I have tried this schedule with brands other than mine, and it works.

Depending on the kiln (front or top loader), I fire the first phase at 1000°F or 1100°F, and open the kiln as soon as the firing is over.

Here is something I have recently found out: at this point, when I open the kiln, sometimes I see that the carbon is on fire. It shouldn’t be. That means that the first phase temperature is too high. The whole idea of the first phase is burning the binder. The binder won’t burn off if the carbon is on fire, for lack of oxygen. So, if the carbon is on fire at the end of the first phase, lower the temperature. Start lowering by 50°F. In one of my top-loader kilns, I had to lower the temperature to 900°F.

Note: when you open the kiln right after the second phase, the carbon should be on fire, or at least glowing. In an overnight firing it should be cool.

I let the box cool down by taking it out of the kiln and leaving it outside (not if it rains). From many of your emails, I have learned that this step is often skipped. Until the next improvement comes, this is an essential step. When I can touch it without burning myself, I proceed to the second phase. I fire at 1470°F or 1520°F, again, depending on the type of kiln. This time it’s an overnight firing.

The first thing I check in the morning is the temperature in the kiln. If its 700°F or more, I will not fire in this kiln overnight.

Then I check the pieces. I sand the copper piece. If it does not look all metallic, and parts of it are powdery, then the temperature was too low. From my experience, with a 2-phase firing schedule, this hardly ever happens. If it does, though, repeating the second phase will sinter the copper, so it is better to err on the lower side.

If the bronze piece curved or blistered, then the temperature was too high. There is nothing you can do to fix this.

If the metals in the mixed pieces look separated somehow, if there is a relief instead of flush surface, or the copper does not show at all (it is covered with bronze), then the temperature was too high. Again, It can’t be fixed. Next time I will try firing at 1450°F or 1500°F.

Testing White Bronze

As stated in the instruction manual, White Bronze has a very narrow range between under-firing and over-firing. I can only report results from my kilns and other people’s kilns. I fire my White Bronze in 2 top-loading kilns. In one of them I get sintering at 1310°F; in the other, at 1250°F. A student with a front-loading kiln reported good sintering at 1325°F.

Changing Conditions

Bear in mind that every time something changes – carbon, box, kiln, location, or weather – the firing temperatures may change as well. If you are testing your kiln for firing a certain clay, don’t change more than one factor at a time. If you are gradually changing the temperature for better sintering, make sure all other conditions stay the same: same kiln, same box, same carbon, same size of pieces, same number of pieces.

There will always be new products on the market, some very tempting. Just remember that if you purchase something new, you may have to change your firing process. The consideration in purchasing a new piece of equipment is not “Is this product going to improve my firing results?”, but rather: “How do I make this product work for me?”. These products don’t come with their own firing schedule, and we can’t expect them to. My only advice is: stay with what works best for you.

In general, what are we looking for in our equipment?

Box: made out of a good heat conductor; takes advantage of most of the kiln’s space; deep enough for carbon below and on top; vented on the top; does not contaminate the kiln.

Kiln: small chamber for even heating; firing elements on all 4 sides; vented on the top (I fire more pieces in a 6.5″ x 6.5″ x 5″ than in an 8″ x 8″ x 6″; first, because I can take advantage of the center of the chamber, and second, because I can fire vertically. The temperature is not lower at the center or the bottom part of the chamber); I think a circular small kiln would be great!

Carbon: coconut-shell based and acid washed; cooling down fast. Except for that, we don’t know much, nor do carbon manufacturers at this point. It’s a matter of trial and error. If you are looking for nice colors, I doubt that the carbon creates them. I have used many kinds of carbon, and with each of them, sometimes I get nice colors, sometimes I don’t. Also, the colors do not indicate if pieces are properly sintered or not.


Feb 4 2011

Back from Mexico

First a reminder: there are 2 spots left for the May intensive at my studio (May 7 – 11). This intensive focuses on troubleshooting in the firing process, finishing work, and a lot of caning and mokume gane.

The five-day workshop I taught in Puerto Vallarta was an unforgettable intensive. A small group at a beautiful retreat called Hacienda Mosaico. We had breakfast together, then worked until 2 p.m., had lunch together, and continued working till late afternoon; at night, we sat by the pool, told stories, and had the best laughs ever. What can be better than bonding over art and Margaritas? I miss you girls already. I hope we can do this again some day.

I took a few photos (some out of focus, sorry). Here are the stairs leading to the studio:

This the studio:

Here are some pieces we made:

The pendant above was made by someone who never touched metal clay before.

So pretty before firing

The earrings above were not fired yet when the picture was taken, but the colors were so pretty before firing.

Wearing our creations:

This is where we spent mornings, afternoons and evenings.

This is almost all of us in a restaurant on the last night. The guy in front is my hubby. (I’m the teacher; he’s the entertainment.)